
How to Choose Dental Implant Screwdrivers in 2026?

Choosing Dental Implant Screwdrivers in 2026 requires more than comparing prices or counting included tips. The right driver must fit the implant system, match the manufacturer’s torque guidance, and support controlled clinical handling. A loose connection can damage the screw head. An unsuitable tip may waste valuable chair time.

Small details matter.

This guide examines driver materials, connection types, handle design, torque compatibility, sterilization requirements, and kit organization. It also considers how digital workflows and expanding implant systems may influence purchasing decisions. Experienced clinicians often check the driver’s engagement before applying force. They inspect the tip under good lighting and confirm that no debris blocks the connection. These simple habits reduce avoidable errors.

Reliability should remain central. Reputable manufacturers provide clear compatibility information, traceable product details, and instructions for cleaning and maintenance. Independent evidence is useful, but it should be interpreted carefully. Marketing language can sound convincing without proving clinical value. A premium finish does not automatically mean better performance.

There is no universal best screwdriver.

A practical choice depends on the implant portfolio, procedure volume, staff training, and local reprocessing capabilities. Some recommendations may also need revision as new systems appear. That uncertainty deserves attention, rather than confident promises. By comparing real handling needs with verified technical information, dental teams can choose tools that improve precision, consistency, and patient safety throughout implant procedures.
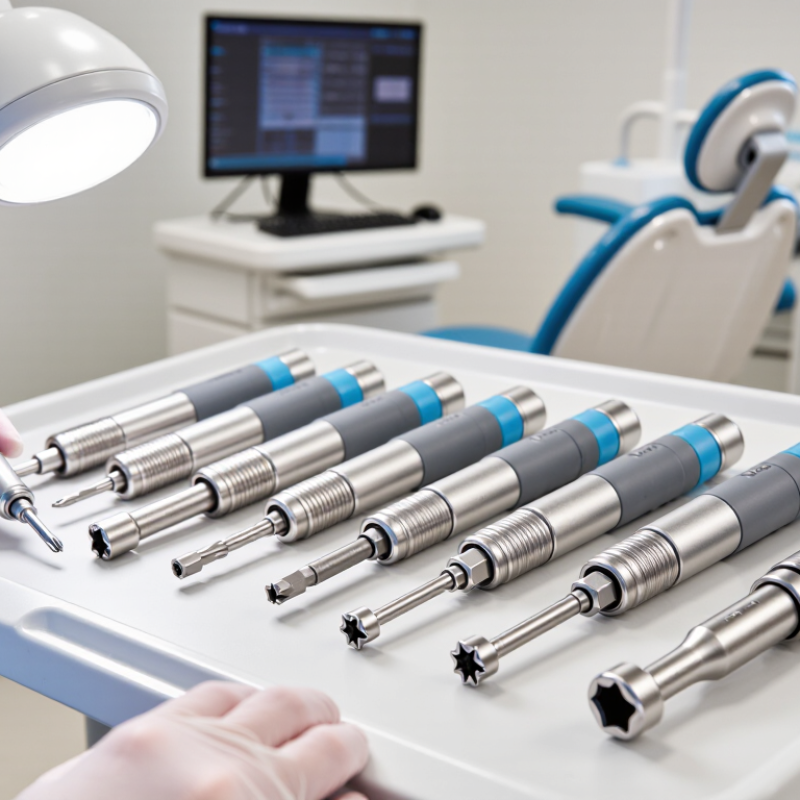
How to Choose Dental Implant Screwdrivers in 2026?

Types of Dental Implant Screwdrivers and Their Clinical Uses

Dental implant screwdrivers are selected by connection, access, and torque needs, not appearance alone.

Common types include manual, ratchet, and motorized drivers.

Manual drivers suit simple adjustments and provide direct tactile feedback.

Ratchet drivers help deliver controlled torque when seating prosthetic screws.

Motorized drivers can improve speed, but require careful torque settings. Driver tips may be hexagonal, star-shaped, or connection-specific. The geometry must match the screw head precisely. Even slight rocking can damage the interface.

Clinically, short drivers work well in open anterior access. Long-shaft drivers help reach deep posterior sites or narrow interocclusal spaces. Angled drivers may improve access when cheeks, lips, or limited opening obstruct a straight path.

Low-torque drivers are useful for initial screw engagement. A calibrated torque wrench is preferred for final tightening.

Healing abutments and cover screws need different handling from definitive prosthetic screws.

Follow the implant system’s instructions for torque values and sterilization. I would not choose one universal driver. That shortcut often fails.

Tips:

Check compatibility before surgery, including tip size, shaft length, and connection depth. Test engagement outside the mouth.

The driver should seat fully without pressure. Inspect worn edges under bright light. Replace questionable instruments.

Clean and sterilize them according to validated clinic protocols. Keep torque devices calibrated.

Record unusual resistance or repeated screw loosening. These notes can reveal occlusal, fit, or technique problems. Small details matter.

Key Compatibility Factors: Implant Systems, Drivers, and Screw Heads

How to Choose Dental Implant Screwdrivers in 2026?

Dental implant care now serves a huge population. The WHO Global Oral Health Status Report estimates that 3.5 billion people live with oral diseases. That scale makes component accuracy essential. A screwdriver is not a universal tool. It must match the implant system, connection geometry, and clinical procedure.

Check the implant platform first. Then confirm the driver interface. Common options include hexagonal, star-shaped, and square screw heads. Measure the driver tip, engagement depth, shaft diameter, and working length. A small mismatch can cause wobbling, head damage, or incomplete seating. Angled restorations also need a driver with suitable access and retention. The screw head must receive full contact, not just its edges.

Torque matters too. Use a calibrated torque device and follow the documented value for that specific screw. ISO 10451:2018 emphasizes defined requirements for implant systems and their components. A 2023 clinical review reported that screw-loosening rates vary widely, often between 2% and 10%, depending on restoration design and follow-up. The number is not comforting. It shows why compatibility records matter.

I still double-check older trays.

Color coding can help, but it is not proof. Verify the connection against the implant record, radiograph, and manufacturer’s technical documentation. Inspect worn tips, sterilization damage, and poor retention before use. A universal kit may seem efficient, yet it can create false confidence. For complex cases, document the exact driver, screw head, torque setting, and replacement plan.

How to Evaluate Materials, Design, Torque, and Ergonomics

How to Choose Dental Implant Screwdrivers in 2026?

How to Evaluate Materials, Design, Torque, and Ergonomics

Start with the material. Corrosion-resistant stainless steel supports repeated cleaning and sterilization. Surface hardness also matters because worn tips can damage screw recesses. Inspect the driver tip under bright light. Look for rounding, scratches, or metal distortion. Even minor wear may reduce engagement and increase slipping. Confirm the instrument’s sterilization instructions before clinical use. Material claims alone are not enough.

Design should support accurate access in limited spaces. A slim shaft can improve visibility around posterior implants. However, excessive length may reduce control and increase bending. Match the driver interface precisely with the implant screw system. Loose engagement is a warning sign. Torque control deserves equal attention. Use the torque value specified in the relevant clinical documentation. A torque-limiting handle should provide consistent resistance, not sudden release. Calibration records matter. They are easy to overlook.

Ergonomics becomes important during repeated procedures. Choose a handle that stays stable with gloved, slightly wet fingers. Rounded edges can reduce pressure points during prolonged use. A textured grip may help, but aggressive patterns can trap debris. Test the driver in a simulated working position before purchasing several units. This is practical, not excessive. It is tempting to favor a heavier instrument because it feels stronger. That impression can mislead. Balance, visibility, cleaning access, and tactile feedback should be assessed together. A short trial may reveal weaknesses that specifications conceal.

Step-by-Step Guide to Selecting the Right Implant Screwdriver

Choosing dental implant screwdrivers in 2026 starts with the implant connection, not the handle. Identify the exact screw head and interface from the restorative documentation. Do not rely on appearance alone. Two drivers may look similar but engage differently.

Check the required tip size, shaft length, and access angle. A longer shaft can reach a posterior implant, but it may reduce control in narrow spaces. Select a handle that supports stable finger pressure without blocking visibility. For controlled tightening, use a compatible torque driver with clear markings. Confirm its calibration status before clinical use. The screwdriver should also tolerate the approved cleaning and sterilization process. Inspect the tip under bright light. Rounded edges, metal debris, or poor engagement require replacement. Small defects matter.

Tips: Keep one documented driver for each implant connection. Test engagement gently before applying torque. If the driver rocks, stop. Never force a mismatched tip. Review the current instructions for use, because connection designs and torque requirements can change. Experienced clinicians still make occasional assumptions, especially when instruments look familiar. That is worth questioning. A practical selection record can include the connection type, tip size, shaft length, torque range, and sterilization method. Simplicity helps, although my own early checklists were sometimes too brief. A second verification step is rarely wasted.

Maintenance, Sterilization, and Safe Use in 2026

How to Choose Dental Implant Screwdrivers in 2026?

A dental implant screwdriver should tolerate repeated torque, cleaning, and heat exposure. Choose a driver with clear size markings and a secure connection. Avoid tools with deep seams or rough surfaces. Residue can hide there. The CDC’s Summary of Infection Prevention Practices in Dental Settings recommends heat sterilization for heat-tolerant critical and semicritical instruments. It also advises chemical indicators for every package and biological monitoring at least weekly. These controls should guide screwdriver selection.

After each procedure, remove visible blood and cement before debris dries. Use the manufacturer’s validated cleaning process, because aggressive brushing can damage the tip. Inspect the driver under bright light. Check for corrosion, worn edges, loose components, and blocked internal channels. A clean-looking tool may still be unsafe. ISO 17665 emphasizes validated moist-heat sterilization processes, including cycle control and documented records. Keep each instrument in a pouch that allows steam contact. Do not overload the sterilizer.

Handling errors remain possible. A driver dropped onto a counter should be removed from service, not quickly wiped. Store sterile instruments in dry, protected cabinets. The WHO Global Oral Health Status Report 2022 estimates that oral diseases affect nearly 3.5 billion people worldwide, reminding clinics how widely safe care matters. The figure does not measure screwdriver failures. That limitation matters. I would review sterilization logs, inspection findings, and replacement intervals every month, then adjust them when evidence changes.